
When you think of innovative, cutting-edge, efficient and productive solutions, think Munix. Every product adheres to the standards of design, ergonomics, manufacturing and quality under the hallmark of KGOC. We stay ahead of the curve by developing solutions that are groundbreaking, both in terms of utility and design to meet international standards.
March, 2019
An innovative and easy way to give your cushion an amazing appeal to enhance your home decor. Watch how Disha used Munix GL 2185 to make a beautiful DIY cushion cover with so much ease and creativity.
Explore
July, 2021
Quality and innovation are extremely important to the Munix brand. Munix is able to provide a range of goods that are not only effective and productive but also aesthetically pleasing and comfortable to use because it adheres to strict design, ergonomics, and production requirements. The stylised X in the logo, which emphasises the emphasis on precise cutting, draws attention to the meticulous attention to detail that goes into each product. Munix is dedicated to serving the needs of a wide spectrum of clients, as evidenced by the fact that the brand offers a variety of items for the home, office, and professional markets in addition to a professional line. Overall, it appears that Munix is a company committed to offering creative and useful solutions.
Special occasions like Father’s day deserves special gifts. Handmade gifts come at the top when we talk about these special moments of love. To make these moments more special with art and craft Munix scissors are here to help you. Our SL-1183 scissors are made of a durable material like stainless steel, & are corrosion-resistant. the handles are made of high quality material, thus ensuring a better grip and durability.
This Father's day, gift your father a creative gift handmade by you to make it more valuable. To help you out, we bring you this video of a customized greeting card made by Nandini aka easycraft_creations. We truly loved your video, Nandini. Thank you so much! Your talent and skills are commendable, and we wish to deliver happiness in our products.
June, 2023
Munix, a label under KGOC ownership, presents a versatile collection of scissors tailored for household, professional, and office purposes. KGOC maintains unwavering benchmarks for design, ergonomic excellence, production, and quality assessments throughout the complete Munix assortment. Every item undergoes a meticulous journey, encompassing the identification of necessities and the formulation of solutions that align with global design criteria and surpass rigorous quality examinations. This meticulous approach gives rise to pioneering, cutting-edge products that amplify users' efficiency and output. Central to the Munix logo is a stylized X that encapsulates the brand's essence. The dual-edged nature of this emblem symbolizes our scissors' exceptional precision, extensively favored by individuals seeking impeccable cutting performance.
Indulge in crafting enduring memories and moments brimming with happiness through this exquisite DIY Explosion Box. Engage in the art of creation, experience the delightful burst of emotions, and watch as your cherished recipient unveils the layers of your deeply meaningful masterpiece.
In this instance, @_handmade_greeting, also known as Sejal, has impeccably demonstrated the process, offering a comprehensive tutorial on crafting your very own DIY explosion box.
Thank you very much, Sejal! We were very impressed with your video and appreciate your talent and skills. Our goal is to bring happiness to our customers through our products.
Explore
Oct 2023
Munix, a distinguished KGOC brand, boasts an array of scissors spanning home, office, and professional domains. Mirroring KGOC's hallmark standards in design, ergonomics, manufacturing, and quality, Munix products undergo rigorous tests. Each item is meticulously tailored to address needs, meeting global design benchmarks and stringent quality criteria.
The Munix logo's stylized X embodies the brand's essence. This symbol's 'double sharp' form mirrors our renowned precision scissors, catering to creative individuals. Munix resonates with our innovative, sharp, and creative customers, shaping products to elevate their performance to its zenith.
Within this charming exhibition of artistic ingenuity, Here, Niha Hanees has masterfully brought to life a captivating DIY photo card with Munix SL-1150 C, a testament to creative brilliance.
Thank you very much, Niha! We were very impressed with your video and appreciate your talent and skills. Our goal is to bring happiness to our customers through our products.
Product used: Munix SL-1150 C
Explore
Oct 2023
Munix, a prominent brand under KGOC's umbrella, offers an extensive range of scissors that cater to the needs of both homes and professional settings. Our commitment to quality, design, ergonomics, and manufacturing excellence mirrors KGOC's renowned standards. Each Munix product undergoes rigorous testing, ensuring that it meets global design benchmarks and the most stringent quality criteria.
The iconic Munix logo, featuring a stylized X, encapsulates the essence of our brand. This double-edged symbol perfectly represents our precision scissors, which are favored by creative individuals. Munix is all about innovation, sharpness, and empowering our creative customers to achieve the pinnacle of performance.
In a wonderful showcase of creativity and heartfelt craftsmanship, Niha Hanees has skillfully crafted an enchanting DIY memory photo box with Munix SL-1150.
A heartfelt thank you to Niha! Your video has left us thoroughly impressed, and we deeply value your talent and expertise. Our ultimate goal is to bring joy and satisfaction to our customers through our top-notch products.
Product name: Munix SL-1150
Explore
27th March, 2024
Tutorial: https://youtube.com/shorts/RIOgBq1YANA?feature=share
Transform your space into a gallery of personalized charm with DIY wall decor crafted using Munix scissors. Here's how:
Materials:
●Colored paper
●Munix scissors
●Adhesive
●Embellishments
●Frames or canvas boards (optional)
Steps:
1.Choose your design and sketch it out.
2.Cut out paper elements with precision using Munix scissors.
3.Arrange elements and add embellishments for flair.
4.Adhere everything securely using adhesive.
5.Optionally, frame or mount your creation.
6.Hang and enjoy your personalized masterpiece.
Conclusion:
Explore
March, 2026
DIY Paper Lilies: A Step-by-Step Guide to Crafting Everlasting Blooms
There is something genuinely magical about watching a blank page slowly become a flower. No soil, no sunlight, no wilting just paper, colour, and a quiet afternoon to yourself. Paper lilies are one of those crafts that look impressively difficult but are surprisingly approachable once you break them down step by step.
Whether you want to brighten up your desk, put together a heartfelt handmade gift, or just try something creative with the kids on a weekend, this project delivers. And here is the thing: most tutorials skip that the tool you cut with matters just as much as the paper you choose. Rough, jagged edges can ruin even the most beautifully painted petal. That is why every step in this guide is designed to work best with a reliable pair of craft scissors, like the Munix High Performance Scissors, built for exactly this kind of detail work.
Ready? Let us get into it.
• White cardstock or heavy duty paper for the petals
• Pink and green watercolours or markers
• Munix Scissors for clean, precise cuts around every curve
• A thin rod, pencil, or wooden skewer for the stem
• Black marker and floral tape or green paper strips
• Glue stick or double sided tape
• Old corrugated cardboard, white paint, and a satin ribbon for the vase
Start by lightly sketching six elongated petal shapes on your cardstock. Think teardrop wide at the base, tapering to a soft point at the top. Now paint them before you cut them. It is much easier to handle a full sheet of paper than fiddly little petals.
Apply a soft pink gradient using your watercolours deeper at the base, fading toward the edges. Once completely dry, add a few tiny black dots near the base of each petal. That small detail is what gives it the authentic Tiger Lily character.
This is the step that makes or breaks the whole project. Cutting curved shapes requires a scissor that glides rather than hacks. With Munix Scissors in hand, follow your petal outline using long, smooth strokes not short, choppy ones. The ergonomic grip keeps your hand steady, and the sharp blade navigates the curves without tearing a single fibre.
Once all six petals are cut, curl their edges outward by rolling each one gently around a pencil. This one move adds dimension and makes the flower look alive.
Cut five or six thin strips of white paper about half a centimetre wide. Colour the very tips black with your marker. Roll them together tightly and bind the base with a small piece of tape. This becomes the stamen at the heart of your lily. It takes two minutes but makes the bloom feel complete and realistic.
Apply a thin line of glue along the base of each petal and press them around the stamen one at a time, overlapping each petal slightly as you go. Hold each in place for a few seconds. Work your way around until all six are secure. The flower should open naturally outward full, layered, and three dimensional.
Paint a few strips of paper in a deep forest green and let them dry fully. Then cut them into pointed leaf shapes with a gentle curve along one edge. Attach them to your stem using floral tape, wrapping from the bottom up. The leaves ground the whole piece and make it look finished rather than floating.
Do not throw out that old shipping box. Peel the top layer off a piece of corrugated cardboard to expose the ridged texture underneath. Roll it into a cylinder, glue the seam shut, and paint it white. Once dry, tie a satin ribbon around the middle. The result looks considered and elegant and costs absolutely nothing.
Can beginners really make paper lilies?
Yes, this project is designed for all skill levels. The steps are straightforward, and the most complex part cutting curves becomes easy with a quality pair of craft scissors.
What if my petals look uneven?
That is actually a feature. Real lilies are never perfectly symmetrical. Slight variation between petals makes your bloom look more natural, not less.
Why do my edges come out jagged?
Almost always a scissor issue. Dull blades crush paper instead of cutting it. Switch to a sharp craft scissor like the Munix range and the difference is immediate.
Place your finished lilies into the handcrafted vase and you have something genuinely beautiful: a bouquet that will sit on your shelf, desk, or gifting table for as long as you want it to.
Crafting is all about the details, and the right tools make those details possible. From navigating petal curves to cutting through thick cardboard, Munix is built to be the scissor you reach for every time. Explore the full range and find the perfect pair for your craft space.
Video Link:
https://www.instagram.com/p/DWd9kOgkXsY/
March, 2026
How to Make Paper Flowers Bouquet: A DIY Guide to Crafting Everlasting Blooms
There is something oddly satisfying about making a flower that never wilts. No water, no worry, just paper, colour, and a little patience. Paper lilies are one of the most rewarding beginner crafts out there, and once you get the hang of it, you will want to fill every corner of your home with them.
The secret to getting clean, realistic petals? It is not your artistic skill, it is your scissors. A sharp, well balanced pair makes curving through cardstock feel effortless. A bad one will fray your petals before you even finish cutting. Let us get into it.
• White cardstock or heavy paper
• Pink and green watercolour paints or markers
• A pencil or thin wooden skewer for the stem
• Black marker, floral tape, glue
• Recycled cardboard, white paint, ribbon for the vase
• A good pair of Munix craft scissors
Sketch six elongated petal shapes on your cardstock. Keep them slightly uneven, real flowers are never perfectly symmetrical, and neither should yours be. Paint a soft pink gradient on each petal, going deeper at the base and fading toward the tip. Drop a few tiny black dots near the base once it dries. That detail alone transforms it from "paper flower" to "Tiger Lily."
Here is where most people get tripped up. Cutting curved petal shapes requires a scissor that can glide, not hack. Using the Munix KGOC craft scissors, follow your painted outline in long, smooth strokes. The fine blade tip navigates curves without tearing, and the ergonomic grip means your hand stays comfortable even through all six petals.
Once cut, curl each petal outward by rolling it gently around a pencil. This single step adds all the depth and drama.
Cut five thin strips of white paper and colour the tips black. These are your stamens. Roll them together, bind the base with tape, and attach to your stem. Simple, but it makes the whole flower feel complete.
Dab glue along the base of each petal and press them around the stamen, overlapping slightly as you go. Hold each one for a few seconds. Wrap the stem in floral tape, then attach a couple of green, pointed leaf shapes cut from painted cardstock.
Peel the top layer off a piece of corrugated cardboard to reveal the ridged texture. Roll it into a cylinder, glue it shut, paint it white, and tie a ribbon around the centre. It looks intentional. It costs nothing. Your lilies now have a home.
Can kids make paper lilies?
Absolutely, just swap to a rounded tip scissor. Munix has child safe options that still cut paper cleanly without the sharp point risk.
What paper works best?
Cardstock or any heavy duty craft paper. Regular printer paper works in a pinch but tends to curl unevenly when painted.
Why are my petals coming out jagged?
Almost always a scissor issue. Dull or low quality blades crush paper fibres instead of slicing them. A precision craft scissor like the Munix KGOC fixes this immediately.
Paper lilies are proof that the best home decor does not have to cost a fortune, just a little time and the right tools. Once your scissors are doing the heavy lifting, the rest of the craft flows naturally. Make one lily, and we promise you will not stop there.
Video Link: https://www.instagram.com/p/DWY7LonEUbI/
Explore
Feburary 2026
In a world full of store-bought gifts and ready-made packaging, handmade creations still hold a special charm. A gift becomes far more meaningful when it carries effort, creativity, and a personal touch. That is exactly why DIY crafts continue to grow in popularity across India, especially among students, hobbyists, and craft lovers who enjoy creating something unique.
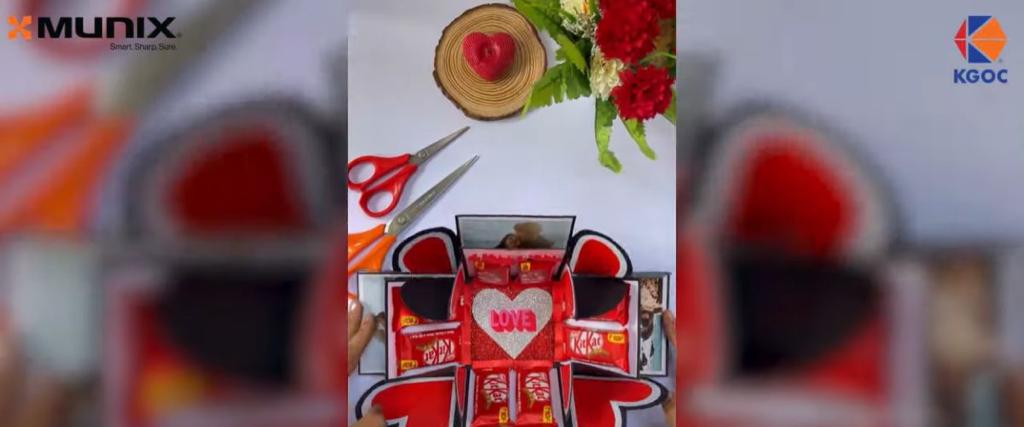
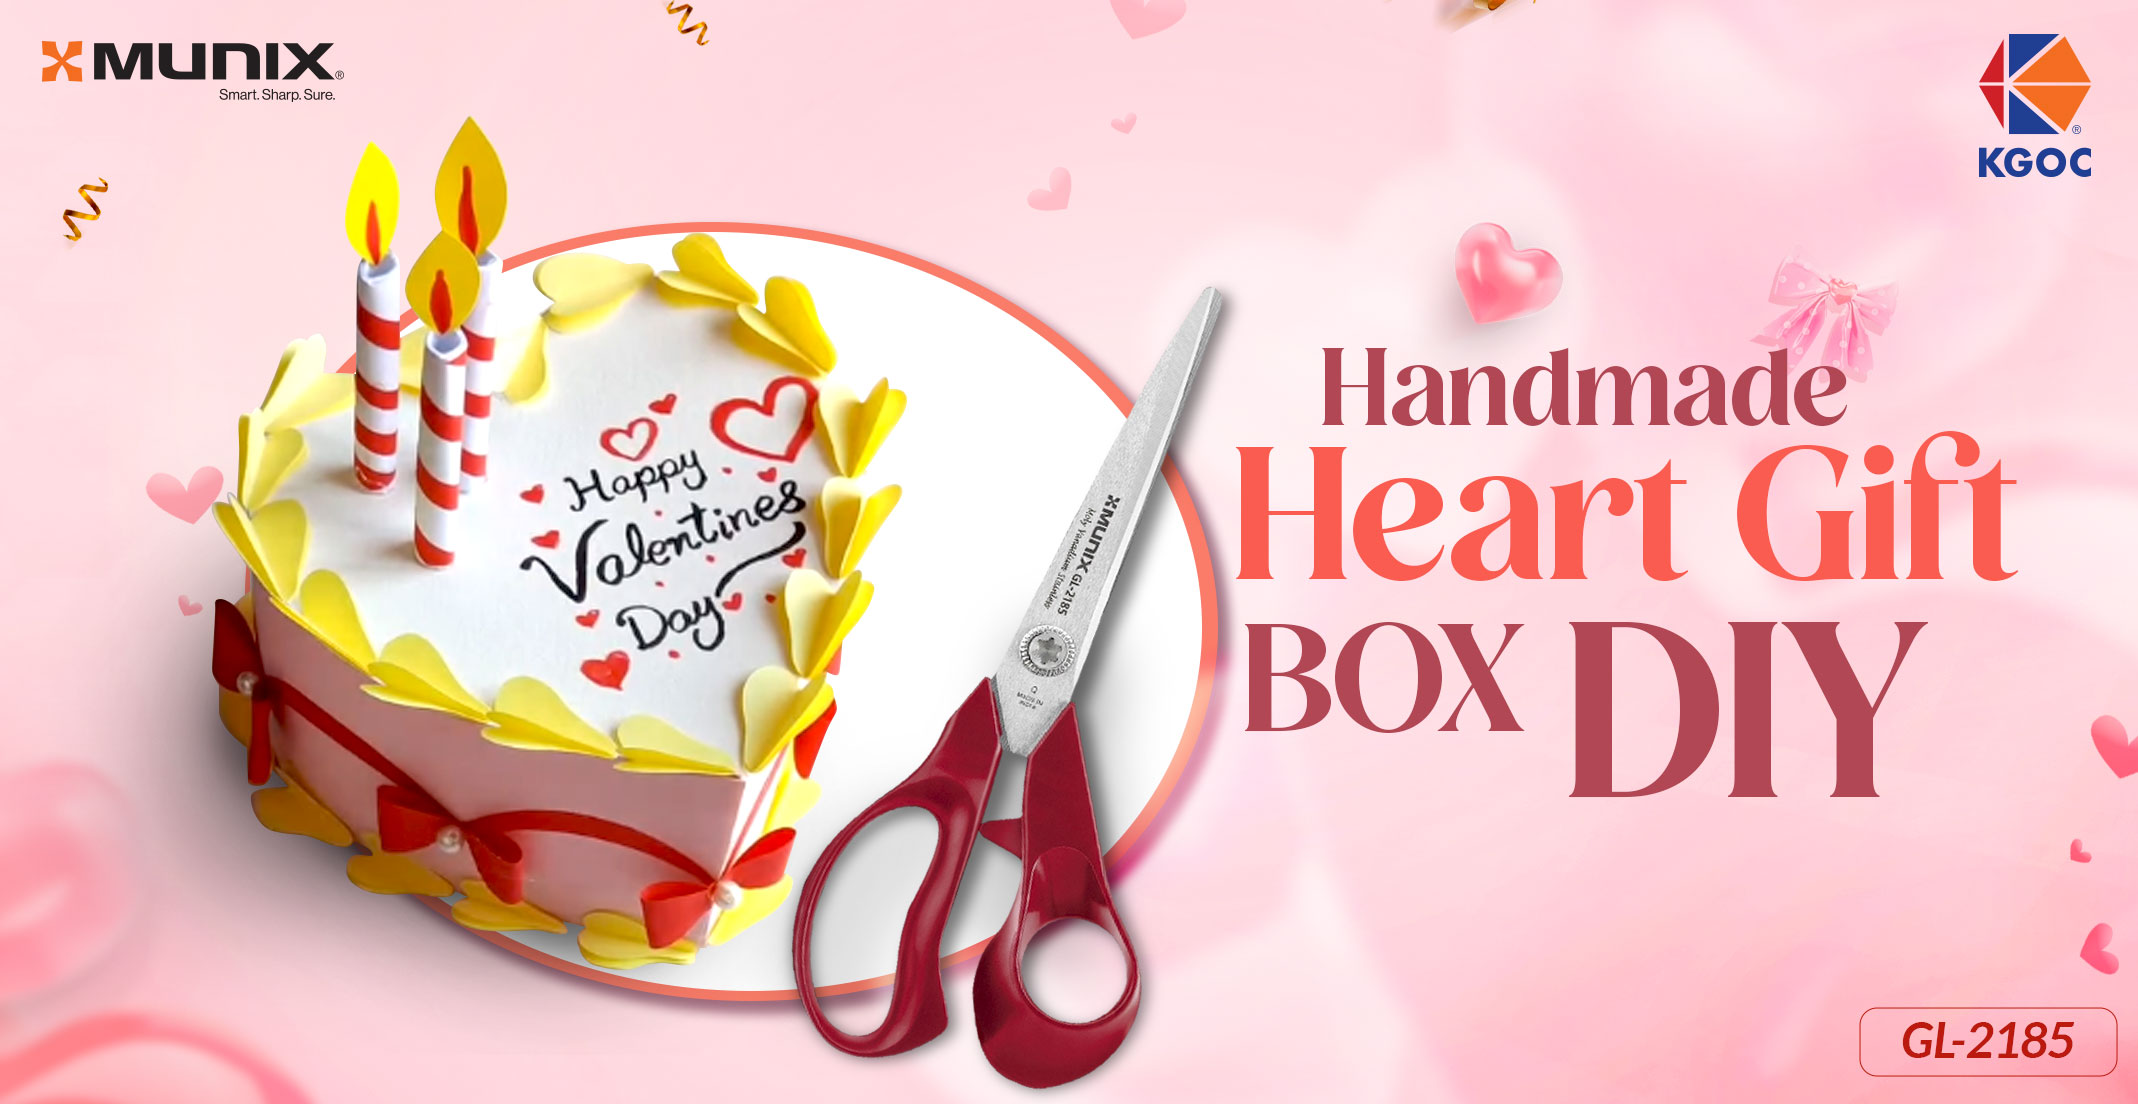
One simple yet beautiful project you can try is a DIY heart gift box. This craft transforms ordinary paper into a stunning heart-shaped box that looks like a decorative cake. It is perfect for holding chocolates, small figurines, jewelry, or handwritten notes. Whether you are creating it for a friend, family member, or special occasion, the final result always feels thoughtful and memorable.
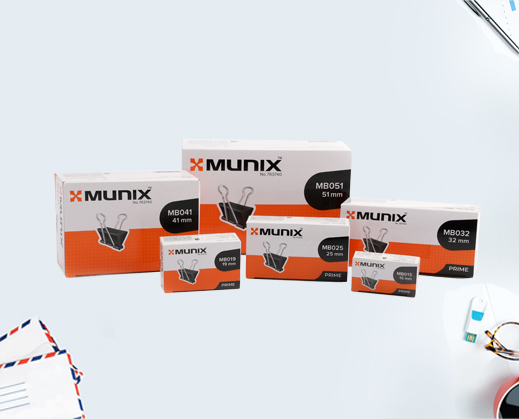
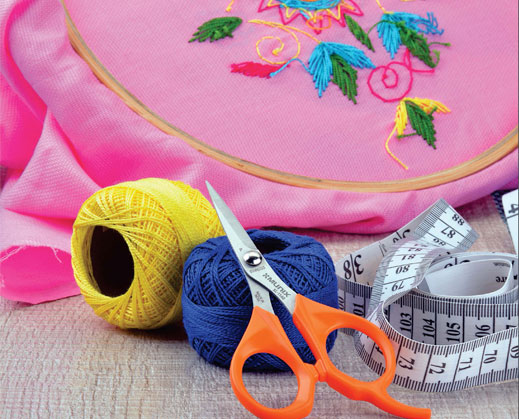
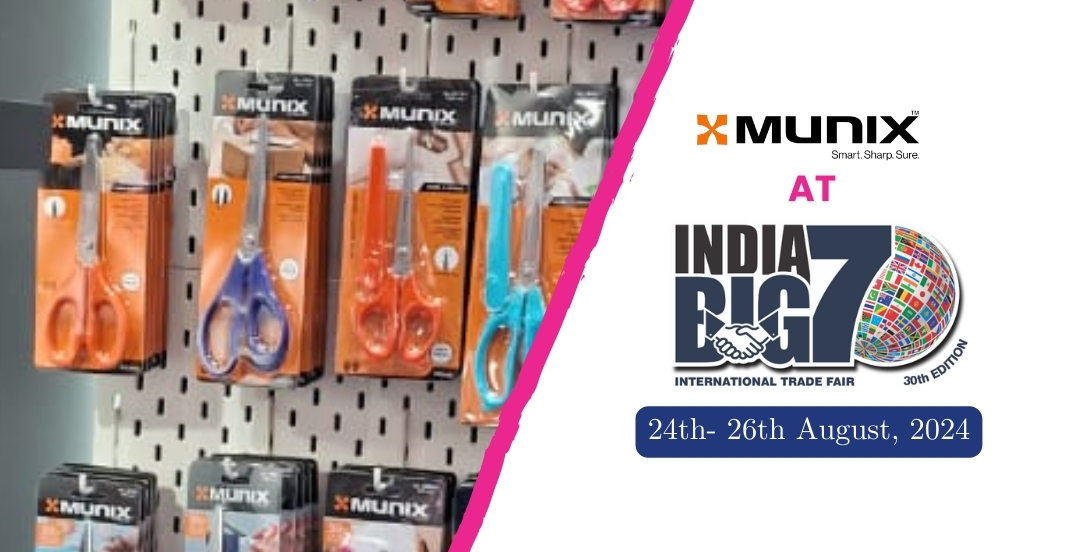
However, when it comes to paper crafts, the quality of your tools plays a big role in the outcome. Smooth curves, neat edges, and precise details depend on using the best quality scissors designed for craft work. Many crafters in India prefer reliable tools like craft scissors from Munix KGOC, known for their durability and precision.
In this guide, you will learn how to create a beautiful DIY heart gift box step by step using simple materials and the right cutting scissors. Let’s begin crafting something special.
Materials Required
Before starting the project, gather the following supplies.
Many craft enthusiasts recommend Munix KGOC scissors because they offer comfortable grip and sharp blades that make paper cutting easier.
Step-by-Step Guide to Make a DIY Heart Gift Box
Start by drawing a large heart shape on white cardstock.
One heart will serve as the box base, while the other will be the lid.
2. Make the Box Walls
To form the sides of the box, you need a long strip of pink cardstock.
Follow these steps:
Now:
Using best quality scissors ensures that the notches are neat and accurate, which helps the box assemble smoothly.
3. Personalize the Lid
The lid is where you can add creativity and personality.
Decorate the second heart cutout by:
You can also add borders or doodles to make the lid look more decorative.
4. Add Cake-Style Decorations
This step transforms the box into a beautiful cake-style gift box.
Decorative ideas include:
Yellow Paper Petals
Red Decorative Strips
Paper Candles
These small details make the gift box look creative and festive.
5. Add the Surprise Inside
Now it is time to fill your gift box.
You can add:
First place blue shredded paper inside the box. This acts as a soft cushion for the items.
Then arrange the gifts neatly inside the box.
6. Final Assembly
Finally:
From the outside, the box looks like a decorative craft piece. But when opened, it reveals a sweet surprise inside.
Why Good Scissors Matter in Crafting
When working with paper crafts, precision makes a big difference. Poor-quality tools can create uneven edges and rough cuts.
Using reliable cutting scissors offers several advantages:
For craft enthusiasts in India, choosing the best scissor brand in India can improve the overall crafting experience.
Brands like Munix KGOC produce high-quality craft scissors suitable for:
Good tools help transform simple materials into professional-looking crafts.
FAQs
Sharp craft scissors with stainless steel blades are best for paper crafts. They provide smooth cutting and better control for detailed shapes.
2. Which is the best scissor brand in India for crafting?
Several brands offer quality scissors, but many crafters prefer Munix KGOC for its durability, sharp blades, and comfortable grip.
3. Can kids make this DIY heart gift box?
Yes, this is a beginner-friendly craft. With supervision and safe scissors for kids in India, children can easily create this project for school activities or gifts.
4. What can I put inside a DIY heart gift box?
You can fill it with:
5. Why are good scissors important for craft projects?
High-quality scissors ensure clean cuts, better precision, and easier crafting, especially when working with curved shapes like hearts.
Conclusion
Creating a DIY heart gift box is a simple yet meaningful craft that turns basic materials into a memorable handmade gift. With a little creativity, colorful paper, and the right tools, you can design a decorative box that looks beautiful and holds special surprises inside.
For the best results, always use best quality scissors designed for craft work. Reliable tools like Munix KGOC craft scissors help achieve smooth cuts, neat shapes, and professional results.
Whether you are a beginner, student, or craft enthusiast, this project is a fun way to explore creativity and make thoughtful gifts that truly stand out.
Happy crafting!
Video Link - https://www.instagram.com/reel/DUfMUECkbsS/
Feburary 2026
If you have ever watched a child doing a craft activity, you already know how exciting it can be. From cutting colorful paper for school projects to creating greeting cards, crafts help children express their creativity and develop important motor skills. But one small tool plays a big role in these activities — scissors.
For kids, regular scissors are not always the safest choice. Children require specially designed cutting scissors that are easy to hold, safe to use, and suitable for learning activities. In India, parents and teachers are increasingly paying attention to selecting the best quality scissor for school and craft use. The right pair of scissors for kids India can make learning more fun while ensuring safety during cutting tasks.
Kid-friendly craft scissors are designed with safety features like rounded tips, ergonomic handles, and lightweight materials. These designs allow children to safely practice cutting paper, ribbons, and craft materials without risk of injury.
Brands like Munix KGOC have introduced school scissors that focus on both safety and usability. With thoughtful design and durable materials, these scissors help children explore creativity in a safe and comfortable way.
In this guide, we will explore everything parents, teachers, and students in India need to know about scissors for kids, including safety features, design elements, common uses, and how to choose the right pair.
Why Children Need Special Scissors
Children’s hands are smaller and still developing coordination. Standard scissors made for adults may be difficult for them to control.
Kid-friendly cutting scissors are designed specifically to support learning and safety.
Using proper craft scissors encourages creativity while maintaining a safe learning environment.
Safety Features to Look for in Kids’ Scissors
Safety is the most important factor when selecting scissors for kids in India. Parents and teachers should look for scissors designed with child-friendly safety elements.
Many modern designs from Munix KGOC incorporate these safety features, making them suitable for school and home craft activities.
Design Elements That Make Kids’ Scissors Effective
The design of scissors directly affects how comfortable and safe they are for children to use. When choosing the best quality scissor, several design aspects should be considered.
These features help transform a simple cutting tool into an effective learning aid.
Examples of Kid-Friendly Scissors for School and Crafts
Several scissors designed for children combine safety with creativity. Products such as those offered by Munix KGOC focus on classroom-friendly designs.
These designs make them useful craft scissors for school assignments and creative projects.
Common Uses of Craft Scissors for Kids
Children use scissors in many school and home activities. Proper cutting scissors help them complete projects more easily.
With the right scissors, children can safely explore creativity while learning valuable skills.
How to Choose the Best Scissors for Kids in India
When selecting scissors for kids India, it is important to balance safety, comfort, and quality.
While many options exist, choosing a reliable manufacturer ensures that the scissors maintain safety and durability during everyday use.
FAQs
Children usually begin using safety scissors around 4 to 5 years old, with supervision from parents or teachers.
Scissors with round tips, lightweight handles, and smooth cutting edges are considered the safest for children.
Yes. All-plastic craft scissors are commonly used for beginners because they reduce the risk of injury while still allowing children to practice cutting.
Ergonomic handles make scissors easier to grip and control, helping children cut more comfortably.
Kids’ scissors are usually designed for paper, craft paper, ribbons, and light craft materials.
Conclusion
Scissors may seem like a simple tool, but for children they play a crucial role in learning and creativity. From school projects to DIY crafts, the right cutting scissors help children develop coordination, creativity, and confidence.
When selecting scissors for kids in India, safety and design should always come first. Features like round tips, ergonomic handles, and lightweight materials ensure that children can enjoy craft activities without unnecessary risks.
High-quality craft scissors designed specifically for kids provide the right balance between safety and performance. Manufacturers such as Munix KGOC focus on creating scissors that support creative learning while maintaining durability and comfort.
By choosing the best quality scissor for school and craft activities, parents and teachers can give children a tool that encourages creativity while ensuring safety — helping young minds cut, create, and explore their imagination.
Explore
A handmade New Year card is a simple way to add warmth to the start of the year. With Munix scissors, you can create clean shapes, neat edges, and a professional finish even at home. This DIY card is quick, creative, and perfect for gifting.
What You Need
● Munix scissors
● Thick colored paper or cardstock
● Glitter paper or metallic paper
● Glue
● Markers or pens
● A ruler
Steps to Make the Card
1. Prepare the Base
Fold a sheet of cardstock into a clean rectangle. Use Munix scissors to trim the edges for a smooth outline.
2. Add a Layer
Cut a smaller sheet of glitter or metallic paper and paste it on the front. This gives the card a festive New Year look.
3. Create Numbers
Cut out the numbers “2025” (or your New Year) from colored paper. Munix scissors help you cut curves and angles neatly.
4. Add Design Elements
Cut stars, fireworks, or small geometric shapes to decorate the front. The sharp blades make detailed shapes easier to handle.
5. Write Your Message
Inside, write a simple New Year wish or paste a small note cut from another sheet.
Final Touch
Give the card one final trim to make it look balanced and clean. With Munix scissors, the overall finish looks crisp and polished.
Final Thought
A DIY New Year card made with Munix scissors is simple but thoughtful. It carries your personal touch and sets the right tone for the year ahead.
Explore
A Christmas wreath adds a warm, festive touch to any home. Making one yourself is simple, budget-friendly, and a great way to bring in the holiday spirit. You can also customise it to match your style and décor.
What You Need
● A wreath base (foam, wire, or cardboard)
● Green paper, artificial leaves, or real foliage
● Ribbon
● Glue
● Scissors
● Small decorative items like bells, bows, pinecones, or stars
Steps to Make Your Wreath
1. Prepare the Base
If you do not have a ready base, cut a ring out of cardboard. Keep the circle smooth and even.
2. Cover the Base
Wrap green paper, ribbon, or foliage around the ring. Make sure the base is fully covered so the wreath looks full.
3. Add Decorative Elements
Glue small items like bells, stars, pinecones, and bows around the wreath. Place them evenly so the design looks balanced.
4. Add a Ribbon Loop
Attach a ribbon at the top to hang the wreath. You can also add a bow for a finishing touch.
5. Final Adjustments
Check if any part looks empty and add more leaves or decorations. Make sure everything is firmly glued.
Final Thought
A DIY Christmas wreath is easy to make and looks beautiful on doors, windows, or walls. It brings a cosy festive feeling and adds a personal touch to your holiday décor.
Explore
There’s something about chocolates that instantly brings joy—and this cute chocolate-themed craft does the same. It’s simple, sweet, and perfect for kids, parents, and teachers looking for a quick creative activity.
Why This Craft?
Because it looks adorable, it’s super easy, and it helps kids practice neat cutting, folding, and decorating—made even better with Munix KGOC scissors.
What You’ll Need
● Brown craft paper
● Red or pink wrapper paper
● Googly eyes
● Glue
● Marker for details
● Munix KGOC scissors for clean, smooth edges
How to Make This Sweet Craft
1. Make the Chocolate Base
Cut a brown rectangle for the chocolate bar. Clean edges matter, and Munix scissors help kids cut confidently without tearing.
2. Create the Wrapper
Cut a slightly larger coloured paper and fold one end into cute ruffles. This gives that real candy-wrapper feel.
3. Add the Face
Stick googly eyes and draw a tiny smile. Suddenly, your chocolate bar has a personality!
4. Assemble & Decorate
Paste the chocolate so it peeks out of the wrapper. Add tiny “chocolate squares” with a marker or add sparkles on the wrapper.
What Kids Learn
● Fine motor skills
● Creativity and imagination
● Neat cutting and crafting habits
● Confidence to create something on their own
Munix KGOC tools make the entire activity smoother and more enjoyable—because when the tools are right, the craft becomes even sweeter.
Explore
If you’re looking for a fun, kid-friendly craft that’s quick, cute, and creative, this Paper Chocolate Craft is the perfect pick. It adds a dash of sweetness to classrooms, playtime, or even gifting—and becomes even easier when paired with Munix KGOC’s smooth-cutting tools.
Materials You Need
● Brown craft paper
● Coloured wrapper paper
● Googly eyes
● Glue
● Black marker
● Munix KGOC scissors for neat edges
How to Create the Chocolate Craft
1. Cut the Chocolate Shape
Start by cutting a rectangle from brown paper. Clean straight edges help the “chocolate bar” look realistic—Munix scissors make that effortless.
2. Craft the Wrapper
Cut a slightly bigger coloured sheet and fold the top like a real candy wrapper. The little ruffles add charm instantly.
3. Bring Your Chocolate to Life
Stick googly eyes, draw a cute smile, maybe add rosy cheeks. This is where kids love getting creative.
4. Assemble & Finish
Glue the brown chocolate bar peeking out of the wrapper. Add tiny block markings to make it look like real chocolate squares.
Why Kids Love This Craft
● It’s adorable
● It’s simple
● It feels like making “real” chocolate
● And with Munix KGOC, every cut is smooth, safe, and easy
Perfect for school activities, festive themes, or just a fun weekend DIY—this chocolate craft brings joy without the sugar rush!
Explore

I have used Munix scissors and I can safely say that these are the best scissors. They are very comfortable to hold, cut the fabric accurately and on top of that, they're multipurpose too. I can vouch for its quality.
For over five decades, KGOC has assisted people in bringing out the best of their creativity with innovative and high precision products through its brands - Kangaro, Miles and Munix. Supported by an efficient distribution network and a dynamic sales and marketing team, it has a strong presence across India in various channels- General trade, Modern trade, E-commerce and Institutes.
About usMunix uses cookies in order to offer you the most relevant information. Please accept cookies for optimal performance.