March, 2026
How to Make Paper Flowers Bouquet: A DIY Guide to Crafting Everlasting Blooms
There is something oddly satisfying about making a flower that never wilts. No water, no worry, just paper, colour, and a little patience. Paper lilies are one of the most rewarding beginner crafts out there, and once you get the hang of it, you will want to fill every corner of your home with them.
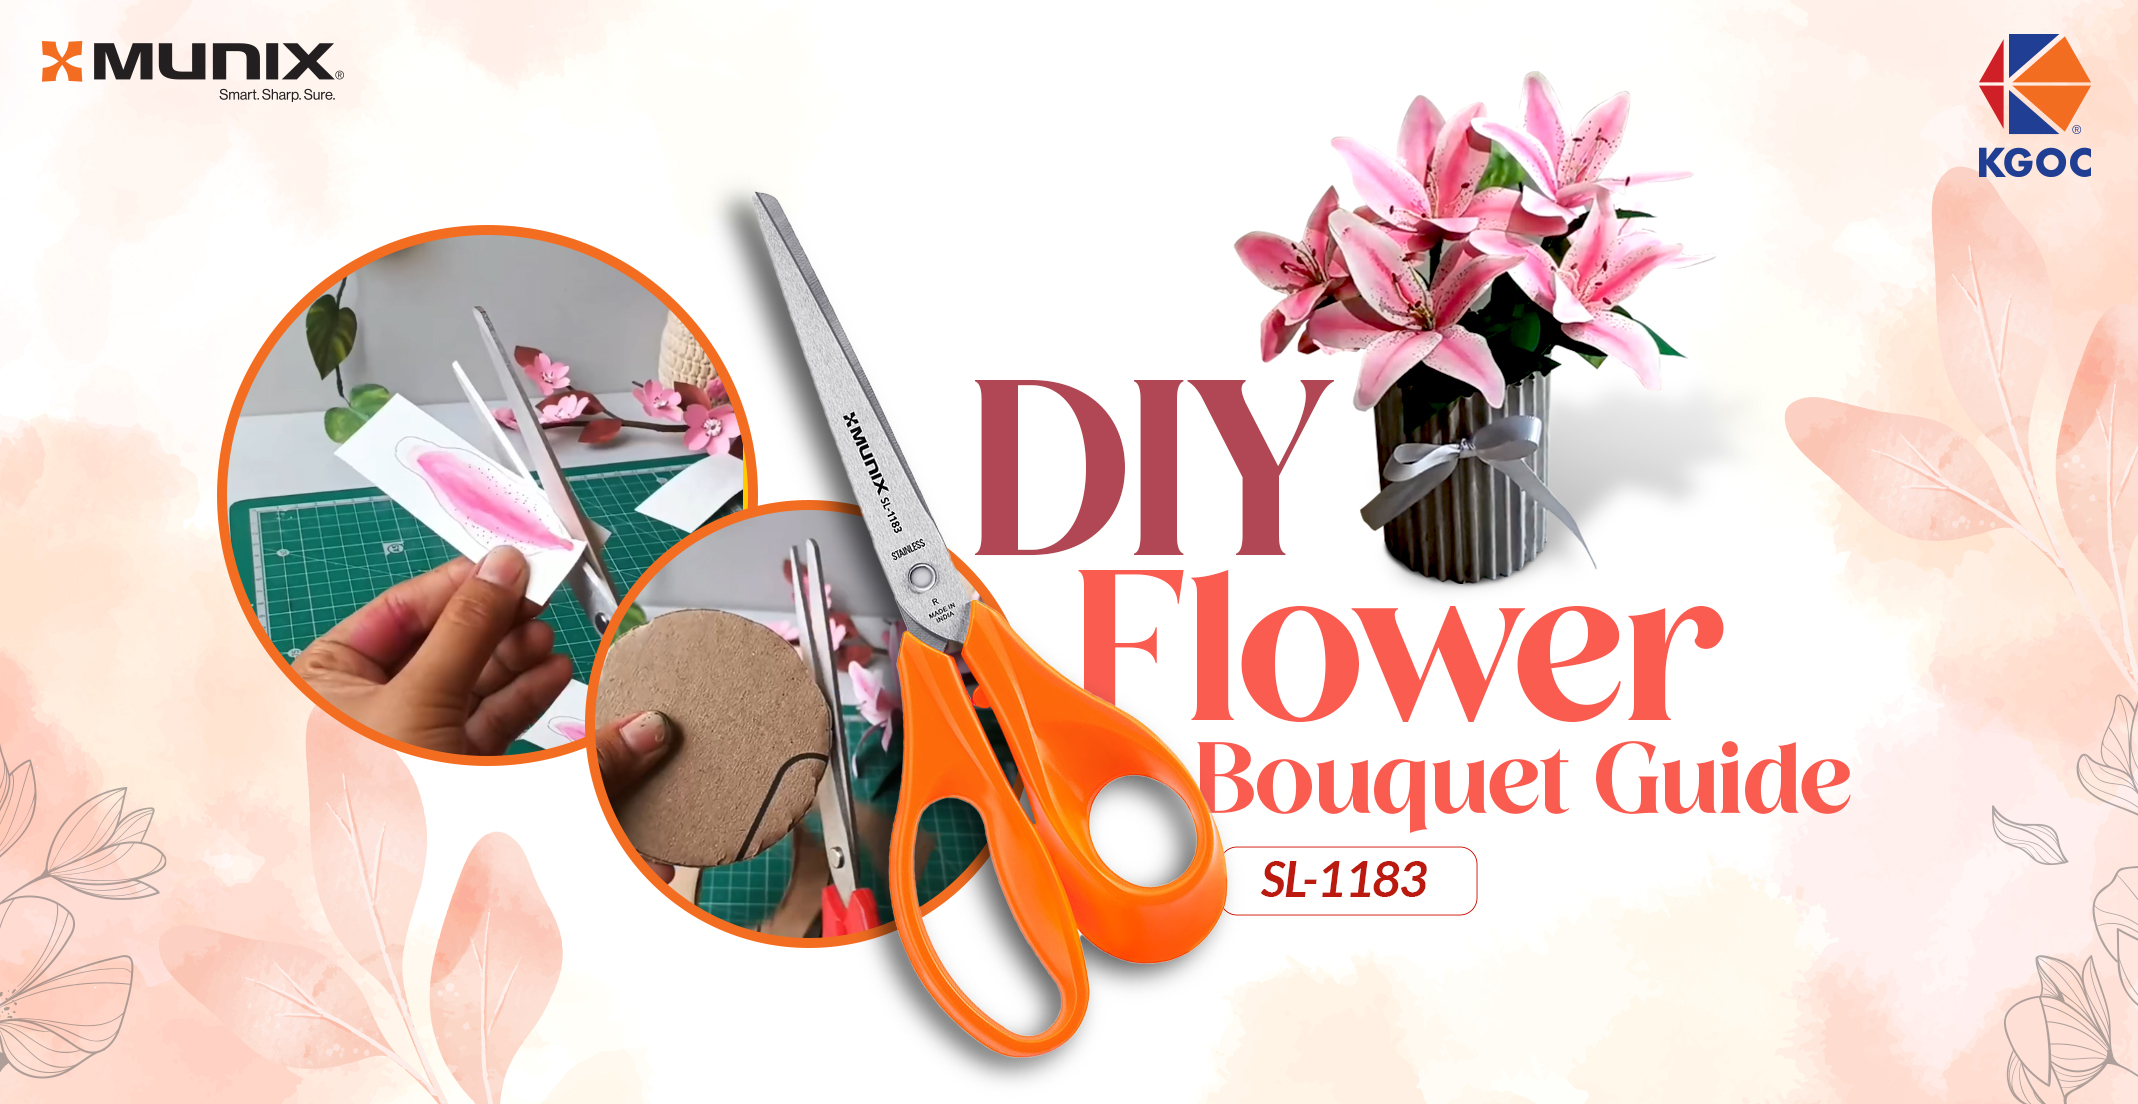
The secret to getting clean, realistic petals? It is not your artistic skill, it is your scissors. A sharp, well balanced pair makes curving through cardstock feel effortless. A bad one will fray your petals before you even finish cutting. Let us get into it.
• White cardstock or heavy paper
• Pink and green watercolour paints or markers
• A pencil or thin wooden skewer for the stem
• Black marker, floral tape, glue
• Recycled cardboard, white paint, ribbon for the vase
• A good pair of Munix craft scissors
Sketch six elongated petal shapes on your cardstock. Keep them slightly uneven, real flowers are never perfectly symmetrical, and neither should yours be. Paint a soft pink gradient on each petal, going deeper at the base and fading toward the tip. Drop a few tiny black dots near the base once it dries. That detail alone transforms it from "paper flower" to "Tiger Lily."
Here is where most people get tripped up. Cutting curved petal shapes requires a scissor that can glide, not hack. Using the Munix KGOC craft scissors, follow your painted outline in long, smooth strokes. The fine blade tip navigates curves without tearing, and the ergonomic grip means your hand stays comfortable even through all six petals.
Once cut, curl each petal outward by rolling it gently around a pencil. This single step adds all the depth and drama.
Cut five thin strips of white paper and colour the tips black. These are your stamens. Roll them together, bind the base with tape, and attach to your stem. Simple, but it makes the whole flower feel complete.
Dab glue along the base of each petal and press them around the stamen, overlapping slightly as you go. Hold each one for a few seconds. Wrap the stem in floral tape, then attach a couple of green, pointed leaf shapes cut from painted cardstock.
Peel the top layer off a piece of corrugated cardboard to reveal the ridged texture. Roll it into a cylinder, glue it shut, paint it white, and tie a ribbon around the centre. It looks intentional. It costs nothing. Your lilies now have a home.
Can kids make paper lilies?
Absolutely, just swap to a rounded tip scissor. Munix has child safe options that still cut paper cleanly without the sharp point risk.
What paper works best?
Cardstock or any heavy duty craft paper. Regular printer paper works in a pinch but tends to curl unevenly when painted.
Why are my petals coming out jagged?
Almost always a scissor issue. Dull or low quality blades crush paper fibres instead of slicing them. A precision craft scissor like the Munix KGOC fixes this immediately.
Paper lilies are proof that the best home decor does not have to cost a fortune, just a little time and the right tools. Once your scissors are doing the heavy lifting, the rest of the craft flows naturally. Make one lily, and we promise you will not stop there.